Multimedia Plus record live presentations

How to Record Live Presentations

We’re often asked how to record live presentations, so that our clients can share with those who were unable to attend or those who want to view again.

In response to this, we use Atomos Ninja-2 recorders, which captures a slideshow’s content with a presenter’s commentary. This requires very little (if any) post-production work, saving both time and money. It works particularly well for small events, or on larger events with multiple ‘breakout sessions’.

A slightly more elaborate set-up can incorporate live camera footage of the presenter into the final video. For this, we use two Atomos recorders: one for capturing the slideshow and one for the camera, with both taking live audio feeds from the mixing desk. The editing takes considerably longer, as the editor must choose whether to display the slideshow or live camera.

The final videos can be made available online—either directly by the client (we send them the video files) or hosted through a website such as Vimeo. This makes the videos easily accessible for online streaming and download.

The technical bit:

Atomos Ninja-2 can record in Apple Pro-Res HQ, Apple Pro-Res 422, or Apple Pro-Res LT formats.

We recommend recording slideshows in Pro-Res LT, which results in smaller file sizes (particularly when filming for a day or more). When creating a slideshow/audio video we drop the frame rate of the slideshow to 5fps (frames per second) since it is not necessary to have it any higher and it will speed up the rendering process. However, if we’re incorporating camera footage, we want the frame rate to match, so recommend 25fps.

For camera capturing, we use Pro-Res HQ as we want maximum quality footage. This extra quality can be particularly useful if we have to crop, zoom in or modify footage during post production.

We use 1TB SSD drives for capturing—which provide ample disk space—and we backup the drives at the end of each day of recording. The Atomos recorders are each supplied with a ‘master caddy dock’, which connects via USB to a computer (and means you don’t need an SSD drive reader).

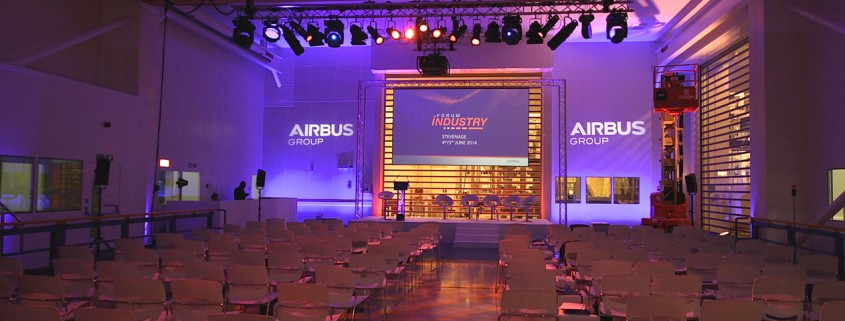
Clean room transformed for presentation

When we were asked to turn a satellite clean room* into a temporary conference theatre for a prestigious presentation, we were intrigued. During our two site visits, we had to wear pyjama-like clothing to prevent contamination!

On the day of the presentation, we used the client’s 12 tonne moving crane to ‘fly in’ our lighting rig, projectors and screen. Rather than disguising the room’s transparent roller shutters, we decided to incorporate them into our design—together with simple lighting, we transformed the space into a striking presentation area.

*NASA’s definition of a clean room is: an environment that is used in scientific research or for building things like computer chips and satellites. It is designed to have low levels of contaminants or environmental pollutants such as aerosols (tiny airborne particles), chemical vapors, dust, and airborne microscopic organisms.

iPad as a Wireless Lighting Desk

On a recent show, we used an iPad as a Wireless Lighting Desk.

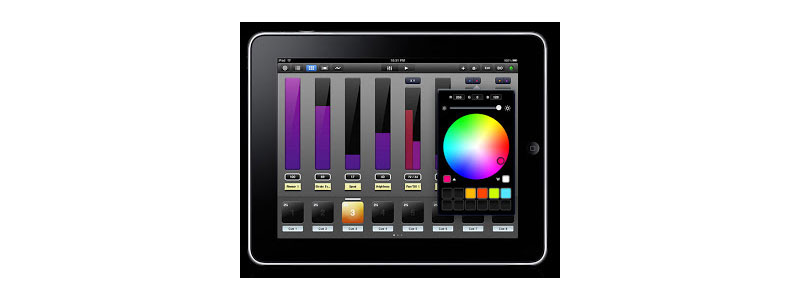
Recently we’ve been saving ourselves hours of time and effort on shows by using the app Luminair (from Synthe-FX), which allows us to wirelessly control DMX lighting fixtures over WiFi via our iPad on some of our smaller shows.

By setting up a dedicated wireless network (using an Apple airport extreme and an Art-Net ethernet/DMX box), we get the iPad to communicate with the receiving DMX lighting fixtures and control them via the Luminair app.

With more complex lighting desks we spend a lot of time programming, but with Luminair it’s easy to control the fixtures on individual faders—or in collective DMX groups. The options on each fader allow us to adjust the intensity and colour of each fixture, as well as different FX options being at our disposal. We can programme sequences to create lighting chases, which proved very useful on a recent show when the client required disco lighting during a band’s live performance. The ability to create different ‘scenes’ means we can easily flick between show states, for instance having a walk-in, a show state and another show state with lectern spots up (see below).

ShowStates_sm


We use battery-powered uplighter, which allow us to have a completely wireless setup for our up-lighters. This saves us time when rigging, since we no longer have to run power or DMX cables to these fixtures. By recently investing in a couple of small portable dimmers and combining them with wireless DMX dongles, we’re also able to control our spot lights through Luminair. This gives us complete control over all our fixtures on the show.

MultiMedia Plus How to shoot video with a smartphone

How to shoot video on a smartphone

Occasionally clients have asked us about how to shoot video on a smartphone: “Could we shoot the video ourselves and hand the footage over to you for editing?”

Whilst they may not have sufficient budget for a professional video shoot, the contrast in quality of the finished video is incomparable. But does it have to be?

With mobile phones nowadays being able to capture both HD and 4K footage, there’s a case for allowing clients to self-produce their material which—as long as they have the right guidance for how to shoot video on a smartphone—would produce highly usable footage to fulfil their video requirements.

Let’s say for instance that the brief was to create a short (2–3 minute) video covering employees’ best achievements of the year. This would involve filming various employees talking to camera, detailing their ‘best achievement’. These interviews could be filmed in a quiet office with plenty of space in order to achieve a variety of shots (with contrasting backgrounds).

If shooting on an iPhone 6 (or equivalent), I would recommend selecting 1920×1080 resolution at 30fps (frames per second), always keeping the phone horizontal (landscape)—NOT upright for portraits!

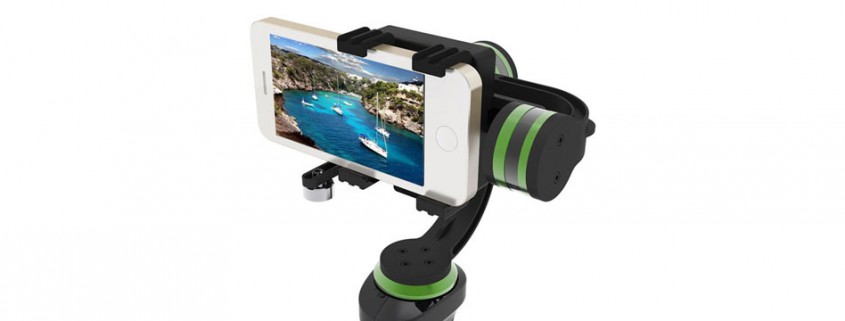
In order to hold the phone stable I’d recommend using either a Tripod iPhone Adaptor on a good tripod of your choice, or using a Lanparte HHG-01 Ultra 3-Axis Gimbal, which stabilises handheld shooting.

Good lighting will strongly enhance the quality of the final video. It can be achieved through a 3-point lighting set-up which involves using three separate lights to ‘key’ (the main source of light), ‘fill’ (to fill in the shadows and create contrast), and ‘back light’ the subject (to separate the subject from the background and create depth). The key should have the highest intensity, with the fill being at medium intensity and the back light on relatively low intensity. To avoid anything too harsh (which will look unnatural), it’s worth using a diffuser or ‘softbox’ to soften the intensity of the lights. You can also use colour-correcting gels to alter the colour temperature of the lights.
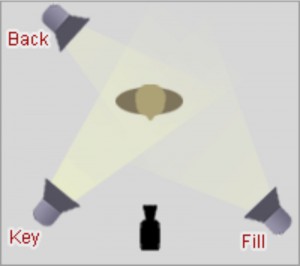
Lighting for Video

(Image source)

By far the biggest issue with recording video on mobile phones is sound quality. The Rode Wireless Microphone Filmmaker Kit provides a great solution for capturing good sound and is compatible with iPhones through its 3.5mm TRS jack connection.

Don’t record in a noisy environment and remember to turn off air conditioners and mobiles—even the quietest ‘off camera’ noise can cause big problems when editing! A carpeted room with soft furnishings (to stop room echoes and reverberations) is better than one with hard surfaces that reflect sound. A clip-on lapel microphone will capture the speaker’s voice and negate unwanted noise—and always conduct a sound check before you starting shooting. I’d suggest filming a sample and when playing it back, listening on some headphones / ear buds to check the sound quality. You want the sound to be as clean and clear as possible.

It’s important to envisage how the video will look once edited together. You MUST be able to provide the editor with a shot list detailing what was shot and what’s usable. This is really important because an editor can spend hours (of chargeable time!) trawling through footage to find what’s usable. If we are onsite for the shoot, we can do this, but if we’re not there, ensure you write a detailed brief of how you see the clips being edited together.

To begin shooting, press record and hold a piece of paper in front of the camera with the person’s name on, then say “Take 1”, “Take 2”, etc. before each one. This makes it much easier to specify what needs to be used in the edit when viewing back the files. Leave a gap (ideally 1–2 seconds) before the subject starts talking. Ensure they maintain their eye-line throughout—either straight into camera or slightly off camera to the interviewer, depending on the style of the video.

At the end of the day, experience is everything. Professional videographers have the necessary equipment and knowledge to fulfil the requirements of the brief. It’s helpful to have the key stakeholder present at the shoot in order to prompt and make suggestions to the subjects regarding their content: ensuring that everyone understands the purpose of the video and what is trying to be achieved, this will lead to a much stronger final piece.

If you’re prepared to invest the time and money into producing your own video content then hopefully this article has offered you some insight into the equipment you’ll need—and some of the fundamentals you should bear in mind when shooting.

When hiring a professional team to create a video, you are paying for their expertise and know-how. They will add production value and will capture quality footage. Whilst the equipment listed and points raised in this article provide you with the means of producing your own basic content, the success of the final video will be determined by the quality of what is shot and how it’s shot. Editors can only work with what they’re given!

Matt Jackson, Multimedia Plus

Flipboard: it’s not all bad news

Guy Ferguson, Technical Director of Multimedia Plus:

Are you fed up with the media only delivering bad news? I am! There must be some good stuff going on, too… right?

Well there is! For a few years now I’ve been using Flipboard on my mobile Phone and iPad.  The software collects content from websites, presents it in magazine format, and allows users to ‘flip’ through their social-networking feeds and feeds from websites that have partnered with the company. Here are my favourites:

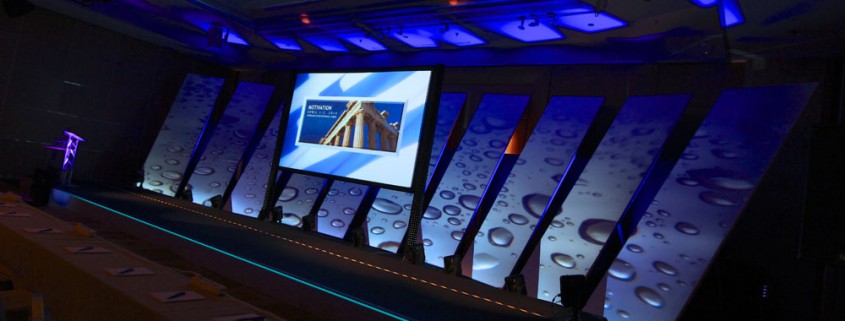
Athens conference — projected stage set design

Innovative conference stage set design

Projected backdrop in Athens.

Using 10 ultrashort throw projectors and Dataton Watchout, we were able to project still and moving images across the angled flats, using a mixture of stills and video we continually changed the backdrop for each presenter and colours of other set panels. We also internally lit with LED the hi-tec perforated screen legs to produce really dynamic stage set.

For more information please see the case study

Video of the backgrounds changing here

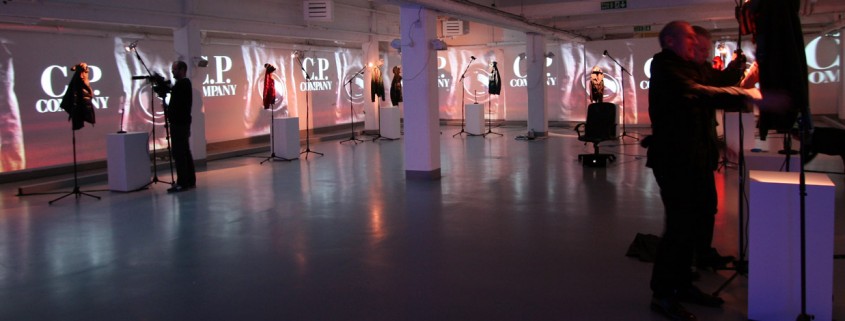
London – 170ft (52M) brick wall projection screen

We were asked to provide a 180 degree floor to ceiling projected images seamlessly blended  at a media event for a new range of clothing for London Mens Fashion last week at the interestingly named Vinyl Factory in London. The challenge was to keep the installation simple by not fixing into the buildings infrastructure by hanging projectors, We used 12 Ultra short throw projectors with incredibly short throw lenses. At distance of 1M from the projection surface,  these projectors give a 2M wide picture!

Using Dataton Watchout we were able to blend the individual projected images  to create one 52m x 2.5m image area wrapping around the gallery. This allowed us to run smooth moving still images, live cameras and video around the room creating a dynamic backdrop for the new range.  More info

London Party

We were asked by Four Marketing to provide a focus backdrop for Arena+ magazine’s 20th anniversary party.

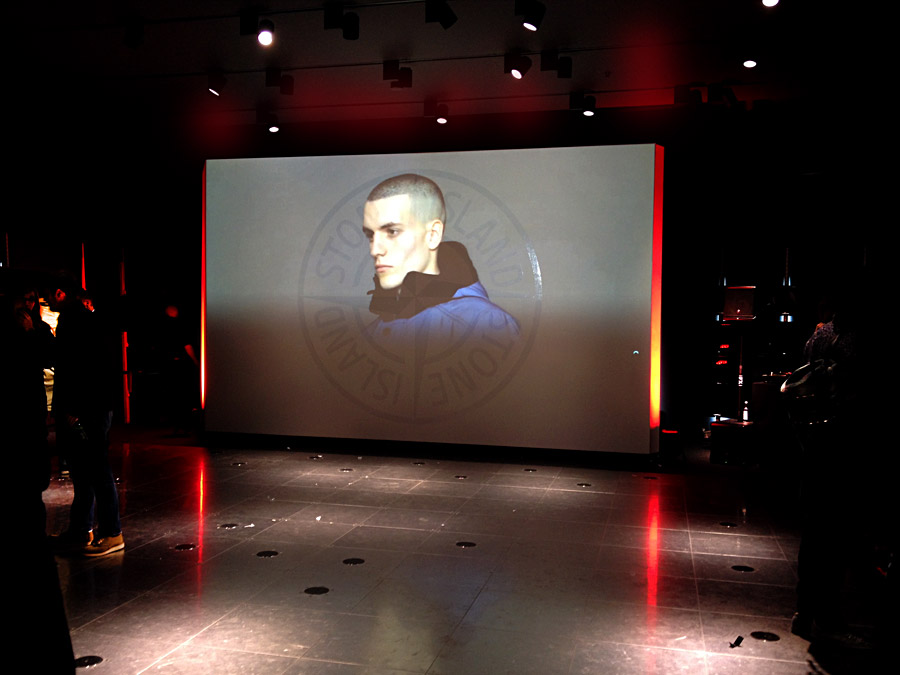
We used two high-power projectors, blended to make one screen for the party at Stone Island’s flagship store in London.

The content was produced with one of our Dataton Watchout systems, using 3 varying length time lines with video, photographs of magazine covers and advertisements. All 3 timelines were different lengths, so the program continually varied throughout the evening. The image was projected over a matt white background, with a gloss white vinyl Stone Island logo, which added another dimension to the final image.

The focal points was the projection, flanked by 2 high power LED uplighters.

Stone-Island-IMG_2850

Success in Prague

We’ve just got back from another very successful event in Prague for Alcatel Lucent. We were working at the Large Prague Hilton where the staff, food and hotel facilities are really good. Lucky really, as this was the second time in as many months we were there for Alcatel.

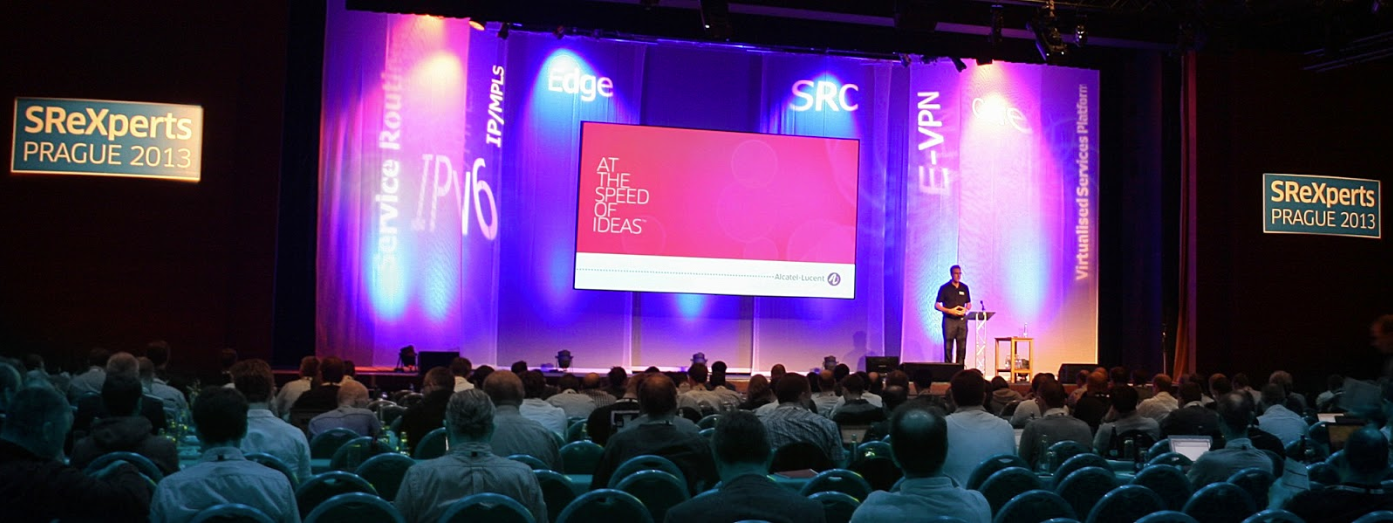
For this latest event, we took all of our own stage sets, equipment, exhibition pods, banners and technical crew in a 45ft truck to support SReXperts which brings together industry experts in #IP technology development and #IP services deployment to exchange ideas and experiences.

This year with a proscenium arch stage, we decided to use a number of sharks’ tooth gauze drapes and a large ‘tablet’ screen ‘floating’ in front for video and speaker support.

The event took place over 3 days but we arrived onsite 2 days before to set up 1 plenary (above), a demo room with 45 LED screens, laptop and power distribution to run all the IT equipment — surprisingly, over 45amps on 3 phases. We then set up 2 training classrooms, exam rooms and a further 4 breakout / presentation rooms, plus numerous digital signage and Twitter wall screens throughout the venue. All digital signage screens were managed and updated from one point.

SReXperts_MMP_IMG_colour-1

This year we had the added excitement of potential floods.  Luckily (unlike 2002) the conference facilities did flood to waist level this year.  In fact the local authorities seemed to have everything well under control and said if we were in any danger of flooding, we would get at least 24 hours notice to move the several million € of our and Alcatel Lucent’s equipment.

SReXperts_MMP_IMG_floods